
Scheduling web push notifications
You can create scheduled notifications that will be sent at a given time in the future. This feature is available both using the dashboard and the API.
Time zone
You can set your local time for the dashboard from the account settings (default is UTC).
The API always uses UTC or the time zone explicitly provided within a date.
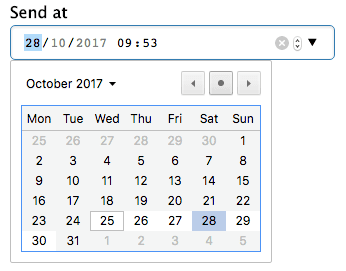
Date and time format
If you use a modern browser like Chrome you will see an handy date/time picker. Otherwise you need to use the following format for the time: YYYY-MM-DDTHH:MM (e.g. 2016-07-25T10:09).
If you use the API, you must use ISO 8601: YYYY-MM-DDTHH:MM:SS.000Z (e.g. 2016-07-25T10:09:00.000Z).
Time limits
You can schedule notifications at most for the next 5 days (i.e. 120 hours).
Targeting
Pushpad uses lazy evaluation for the targeting options (e.g. user IDs, tags). That means that when you create a scheduled notification, the recipients are evaluated when the notification is actually sent and not when you create the notification.
For example, suppose that you have two users called "user1" and "user2" with the tag "tag1". Then you create a scheduled notification and you configure it to reach all the subscriptions that have "tag1". While the notification is scheduled, the "user2" removes its subscription and a new user "user3" creates a new subscription with "tag1". Finally the notification is sent: the recipients will be "user1" and "user3".
Billing
Notifications are charged when the notification is actually sent, not when you schedule it. For that reason you must always make sure to have enough credit, otherwise some notifications might be cancelled.
Alternatives
Although you can use scheduled notifications from the API, you should also consider the following alternatives. They have some advantages: for example you never need to cancel notifications and you don't have the time limit of 5 days.
In some cases you can find an event nearer to the moment when you send the notification. For example, suppose that you have a booking website and that you want to collect feedback from the users. Instead of scheduling a notification when they book the apartment, you may send an immediate notification when they actually perform the check-out.
You can use a background worker, like Sidekiq for Ruby, that supports future jobs. When you need to send a future notification you can schedule a job in the future and that job will trigger an immediate notification on Pushpad when it will be executed.
Another alternative is to use cron jobs to send notifications. For example, if you want to send a notification to all your users after 15 days from their sign up, then you can use a daily cron job that queries your database to find the users who have registered 15 days ago. Then it simply sends an immediate notification to those users. See also this blog post.
Cancelling scheduled notifications
While a notification is scheduled, you can cancel it.
From the Pushpad dashboard go to your project, then click Notifications and open the notification. Near the Send at you will see a Cancel button.
You can also cancel notifications programmatically using the REST API: see DELETE /notifications/NOTIFICATION_ID/cancel.
Note that notifications may also be cancelled by Pushpad if you exceed your usage quota.